• Advertisement

Simple use of Shared Preference Android

Here is a very simple implementation of Shared Preferences in Android Development.

Step 1:   Create a Shared preferences object prefs from file “com.sagar.prefs”.

SharedPreferences prefs = getSharedPreferences(“com.sagar.prefs”, Context.MODE_PRIVATE );// this code is enough for creating the file and getting its object.


Step 2. Write some value in the shared preferences

copy this method in your code:

private void setPreferences(String key_str, String value_str){

           Editor editor = prefs.edit();
           editor.putString(key_str, value_str); 
           editor.commit();
}

and use this to save any value in shared preferences  setPreferences(“name”, “value”); // this will save the value for this name.


Step 3: Get data from shared preferences:

String str = prefs.getString(“name”, “d”);  // where d is the default value which will be return if there is no value for the given “name” in the shared preferences.


GCM server Side php

Here is the server side programming for GCM (GOOGLE CLOUD MESSAGING) I have not tried this yet but I found it here: https://github.com/mattg888/GCM-PHP-Server-Push-Message

setDevices($devices);
$response = $an->send($message);
———————–

$apiKey Your GCM api key
$devices An array or string of registered device tokens
$message The mesasge you want to push out

@author Matt Grundy

Adapted from the code available at:
http://stackoverflow.com/questions/11242743/gcm-with-php-google-cloud-messaging

*/
class GCMPushMessage {

var $url = ‘https://android.googleapis.com/gcm/send’;
var $serverApiKey = “”;
var $devices = array();

function GCMPushMessage($apiKeyIn){
$this->serverApiKey = $apiKeyIn;
}

function setDevices($deviceIds){

if(is_array($deviceIds)){
$this->devices = $deviceIds;
} else {
$this->devices = array($deviceIds);
}

}

function send($message){

if(!is_array($this->devices) || count($this->devices) == 0){
$this->error(“No devices set”);
}

if(strlen($this->serverApiKey) error(“Server API Key not set”);
}

$fields = array(
‘registration_ids’ => $this->devices,
‘data’ => array( “message” => $message ),
);

$headers = array(
‘Authorization: key=’ . $this->serverApiKey,
‘Content-Type: application/json’
);

// Open connection
$ch = curl_init();

// Set the url, number of POST vars, POST data
curl_setopt( $ch, CURLOPT_URL, $this->url );

curl_setopt( $ch, CURLOPT_POST, true );
curl_setopt( $ch, CURLOPT_HTTPHEADER, $headers);
curl_setopt( $ch, CURLOPT_RETURNTRANSFER, true );

curl_setopt( $ch, CURLOPT_POSTFIELDS, json_encode( $fields ) );

// Execute post
$result = curl_exec($ch);

// Close connection
curl_close($ch);

return $result;
}

function error($msg){
echo “Android send notification failed with error:”;
echo “\t” . $msg;
exit(1);
}
}

?>

Data type for Storing A large number in java

To Use Large number like 123456789.3423 in java we can use the following Data Types

BigDecimal,

BigInt

BigFloat


How To Use:

BigDecimal bd = new BigDecimal(12345667777.343423423);


Android ListView with multiple String arrays using Simple Adapter

Here is a Simple and very Easy tutorial if you want to show more than two lines in a single list item.

Steps:

  1. Create 2 layouts in res/layout folder. “main.xml” and   “list_item.xml”
  2. Create a listview in main.xml                (code given below)
  3. Create two textview in list_item.xml      (code given below)
  4. Create MainActivity and set main.xml as its layout. (code given below)
  5. Run the application.

source belowSource code:

Continue reading

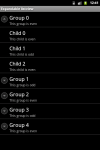
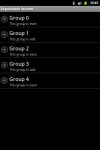
Android Expandable List Simple example

Android Expandable List Simple example

This is a very important view of Android and it is really complicated but here is a very simple example for the ExpandableListView.

  • Create new Android Project with package name  “com.sagar.expandablelistview.example”.
  • Create Main Activity “ExpandableListExample.java”.
  • You don’t need any layout.xml for this example.
  • Copy the code in your ExpandableListExample activity.

source belowSource code:

Continue reading

Google Cloud Messaging For Android (GCM) Simple Tutorial

Important: C2DM has been officially deprecated as of June 26, 2012.

It has been replaced by Google Cloud Messaging For Android (GCM)

This Tutorial will guide you how to create a sample simple application using the GCM functionality,

This demo will help you registering and unRegistering android device from GCM server

Getting your Sender ID

  • STEP 1.  Register Here .
  • STEP 2.  Click Create project. Your browser URL will change to something like:
    " https://code.google.com/apis/console/#project:4815162342 "

    Take note of the value after #project: (4815162342 in this example). This is your project ID, and it will be used later on as the GCM sender ID. This Id will be used by the Android Device while Registering for Push Notification.

  • STEP 3. Choose Service tab from the left side menu on the web page. and turn on ” Google Cloud Messaging for Android “
  • STEP 4. Go to API Access tab from the left menu of web page.

press Create new Server key and note down the generated key


CREATING APP FOR GCM

Continue reading

ArrayAdapter Example Android with Source Code

//Pending

ArrayAdapter Example Android with Source Code

//Pending

ArrayAdapter Example Android with Source Code

Android Listview with Images Example with Source Code

//Pending